
I love my kitchen island design. It gives me the freedom to hover around my cooking space. The additional storage, countertop, and versatile workstation optimize the kitchen. The central gathering area and seating space allow my folks to accompany me when cooking. Plus, the aesthetics are irresistible. Recently, I realized that I could enhance the design with a shiplap kitchen island. And I am on it!
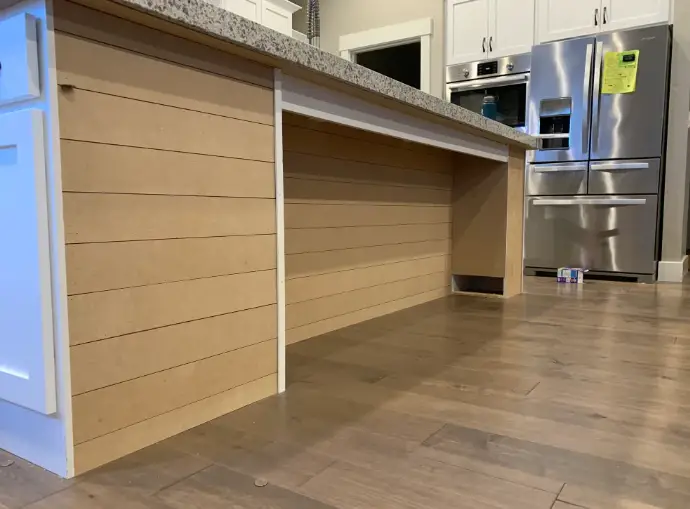
This is a simple style that beautifies your design. A shiplap kitchen island has horizontal textured wooden planks that bring a rustic and textured charm to your existing style. These characteristics and gaps along the wood planks create a visually appealing and elegant surface.
Believe it! This makeover breathes new life into your kitchen and makes a charming space for your guests. The appeal is elegant and timeless. This guide explores comprehensive steps to transforming your kitchen island with shiplap. Learn the design, materials selection, installation techniques, tools, and finishes.
Essential Steps For A Stunning Kitchen Island With Shiplap Makeover
Below are the essential steps for bringing a rustic and textured charm to a shiplap kitchen island.
Design
The premier step before diving into your shiplap kitchen island makeover is to gather design inspiration. There are countless resources online and in physical showrooms to get this information. Before my kitchen island update, I walked through online and hard copies of interior design magazines. Also, various online platforms and social media pages to explore shiplap kitchen island styles. Gather an album of images and a collection of ideas, and pick what matches your existing design.
When choosing a design, have the following in your mind;
- Color palettes: The new design must match your kitchen’s existing colors. This match brings harmony to the final product.
- Finishes: Existing finishes are an elephant in the house when picking your shiplap kitchen island design. These features confuse even experienced renovators. Everything must fall in place to complement the aesthetics. The images and ideas must also resonate with your vision so that the new add-on does not crush your existing finishes.
- Architectural details: Unless you want to do a significant haul of your kitchen, the plumbing system, cabinetry, lights, and other architectural designs will remain. So, your new addition should complement these existing fixtures. Whether aiming for a farmhouse-inspired island or a more modern twist, gather images and ideas that resonate with your vision.
Material Selection
You need suitable materials after selecting the design for your shiplap kitchen island makeover. You will need the following;
- High-quality shiplap boards made from durable wood, including pine cedar or engineered wood. The color should match your kitchen’s existing cabinetry and wall colors.
- Appropriate nails or screws.
- Adhesive to attach shiplap boards.
- Paint or stain if the wood is natural.
- Protective finish, including sealant or polyurethane.
- Sandpaper to smoothen edges and other imperfections.
- Safety equipment to protect yourself during the shiplap installation process.
- Tools like a tape measure, level, nail gun, drill, saw, etc.
Preparation
Before embarking on your shiplap kitchen island’s installation process, you must prepare a few things. One is removing any finishes on the kitchen island, including paint, wallpaper, or varnish. Use the necessary removal processes depending on the type of finishing.
Once the surface is clear of the finishes, scrub it until it is smooth. A sandpaper can help clean the surface, but you will require a good grade that matches your kitchen island.
Gather your materials, tools, and equipment to prepare for the job. If hiring a contractor, ensure they have the necessary tools for the project. Any worker who turns up without a tape measure, saws, nails, saws, safety equipment, and other items ready for the job must be a dubious one. Consider another source of labor for your shiplap kitchen island makeover.
Installation Techniques For FarmHouse Shiplap Kitchen Island
Is it a do-it-yourself installation? If so, start the shiplap installation by measuring your kitchen island. Measure all the sides, front, and back of the island. Record on a notebook and begin cutting the boards.
Starting from the bottom and working your way up works better. The technique ensures that each board fits at a level before you secure it in place. Once you have all the pieces, begin the actual fixing. The method and tools you will use depend on whether you use hardware or adhesive. If it is nails and screws, you need a nail gun.
Before affixing the shiplap boards, ensure they fit perfectly and tightly on the kitchen island surface. The corners and edges require a 45-degree angle for a seamless look. Cover your island with the shiplap board while ensuring a smooth match with the countertop. Don’t worry about imperfections, as sandpaper can help smoothen the rough edges.
Final Touches On Kitchen Island With Shiplap
You did it! Your shiplap installation is now complete. The edges fit perfectly and are smooth. Though you feel tempted to clean up and invite your folks for light kitchen gossip, it’s not time yet! Add the final touches to finalize your shiplap kitchen island makeover. If you use plain wood, you might need to color it with complementary colors. Again, these should match yours. You will also enhance the style by ensuring your fittings last long. Pop a protective finish to safeguard your island, whether you use cedar, pine, or engineered wood. The lacquered finish will give your busiest area durability and longevity.
Other Shiplap Kitchen Island Finishes
- Pendant lights above the kitchen island
- Open shelves
- Baskets
- Contrasting countertop materials like marble and granite.
- Plain wood
- Weathered finish
- Faux finish
- High gloss finish
- Stained finish
- two-tone finish, etc.
Parting Shot
A shiplap kitchen island makeover turns your cooking space into a charming and unique place. It provides a relaxing, evoking rustic, inviting kitchen after your hustle and bustle of daily life.
Also, the makeover enhances your kitchen’s overall design, thus changing its aesthetics and adding to your home’s value. You can overhaul or engage a professional to elevate your kitchen style with the above steps. Choose great finishes for the shiplap to complement your old design. The horizontal style isn’t cast on stones; consider a vertical shiplap kitchen island. Good luck.
